Tactical Formations: Powerplay
It's time to explore a couple of powerplay setups that are used by some NHL teams, including the Ottawa Senators.
Welcome to the third installment of our Tactical Formations series. Nate looked at breakouts here, and Michaela discussed the Penalty Kill a couple of days ago. The powerplay is an interesting thing to look at tactically, mainly because it involves a lot of strategy when a) gaining the offensive zone, and then b) utilizing your players according to their strengths. Although the Senators don't have a shooter like Ovechkin or Stamkos to exploit opposing defensive schemes, they do have one of the best quarterbacks of the powerplay in Erik Karlsson, who is 4th in the NHL in PP Points/60 since 2010, and is tied for first with 70 PP points. I do think that the Sens PP will take a hit from losing talents like Spezza and Hemsky, who you'll see played a big part in a couple of the goals I'll showcase today. Hopefully the young guys who are ripe for more minutes like Zibanejad and Hoffman (who can play point), and Mark Stone (who can screen), make up for some of the inevitable loss in production.
As Nate touched on breakouts in his previous piece, this article will mainly focus on the tactics used after you enter the offensive zone. If there's interest, I'll gladly do a separate piece on the various types of powerplay breakouts.
Due to the Senators focusing on their defense being active during the PP, the puck usually moves back to the point quickly after entry. This is often done in two ways: by reversing the puck after a clean entry, or by puck retrieval after a dump-in. After the players have solid possession of the puck, the powerplay is usually set up in one of three different ways: the overload, the 1-3-1, or the 'split' powerplay. All three will be briefly discussed in this article, and as I mentioned earlier, the formation most frequently used depends on the coaching staff's evaluation of their personnel and how to use them.
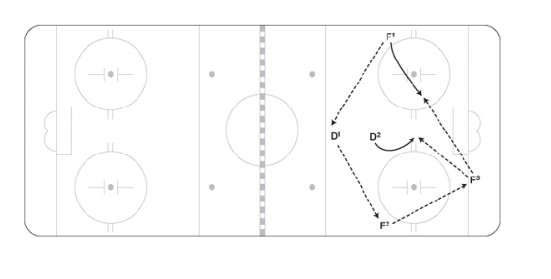
Before we begin, here's a quick legend for the diagrams

The Overload
As implied by the name of this formation, the players often focus on one side of the ice, called the "strong side", that includes three or four of the attacking players. In this setup especially, net presence is critical to success, and it's important for that player to either a) be screening the goalie, or b) be able to quickly move down low for puck retrieval or to get into a scoring area. The defense is also critical here, with the offensive team trying to twist the "box" of the defenders around in order to open up shooting lanes. This is often accomplished by having the strong-side D quickly moving the puck across the blue line, or by walking the line to mid-point before shooting or passing to the players on the half boards, or by having quick interactions between the D and the half boards player.
There are a variety of ways that you can position your players for set plays using the overload set-up, but I'll show you one such tactic often used by the Sens that led to a goal.
Strong Side D Shot
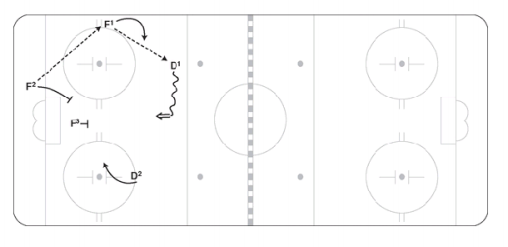
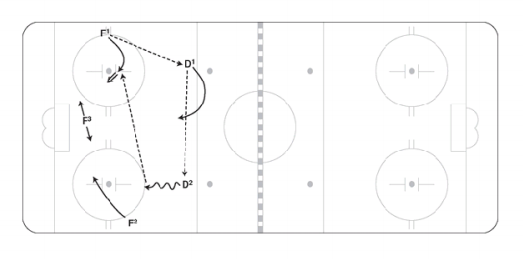
In this setup, two of the strong-side forwards work along the boards to gain possession of the puck, before reversing it up to the strong-side D, who can either shoot the puck from his position, or walk the line to get a better lane before shooting. The other forward, labelled F3, provides a tight screen in front of the net, and is well-positioned for a deflection, or to gather up a rebound.
Here's an example from a game against the Islanders in which Milan Michalek is the beneficiary of this set-up.
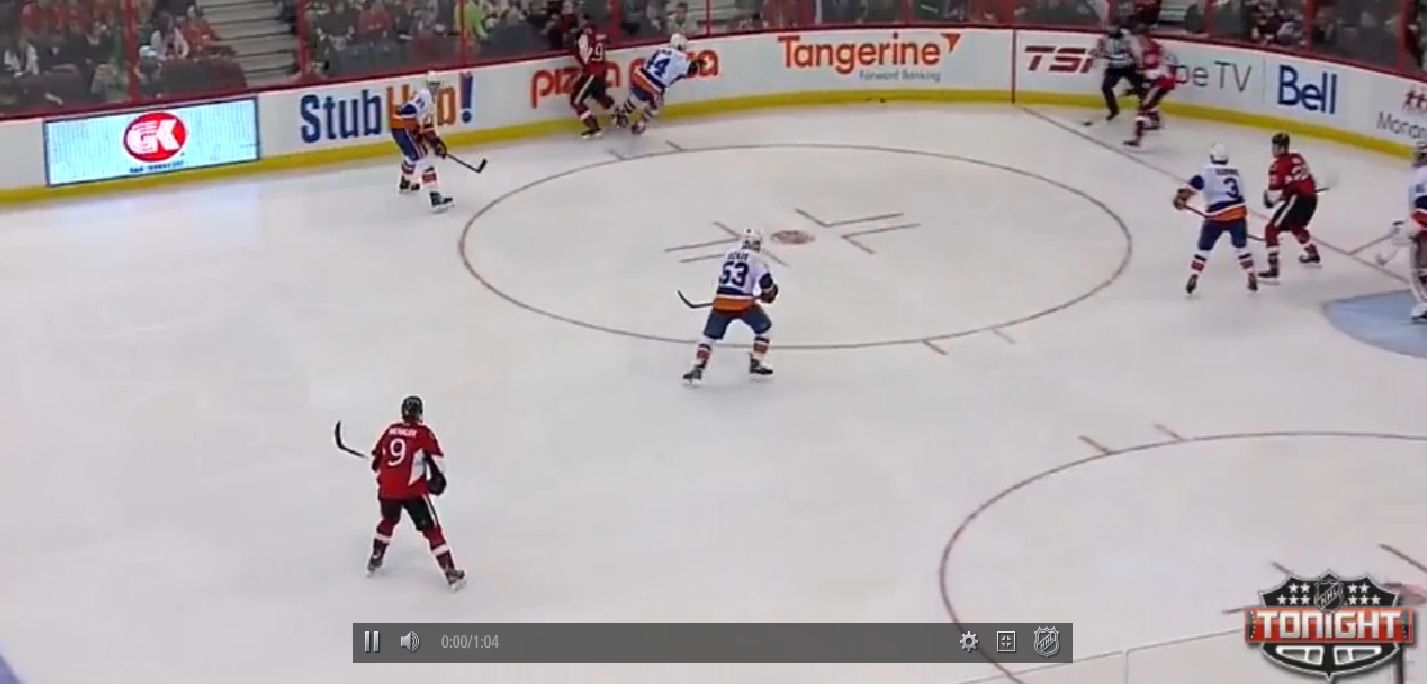
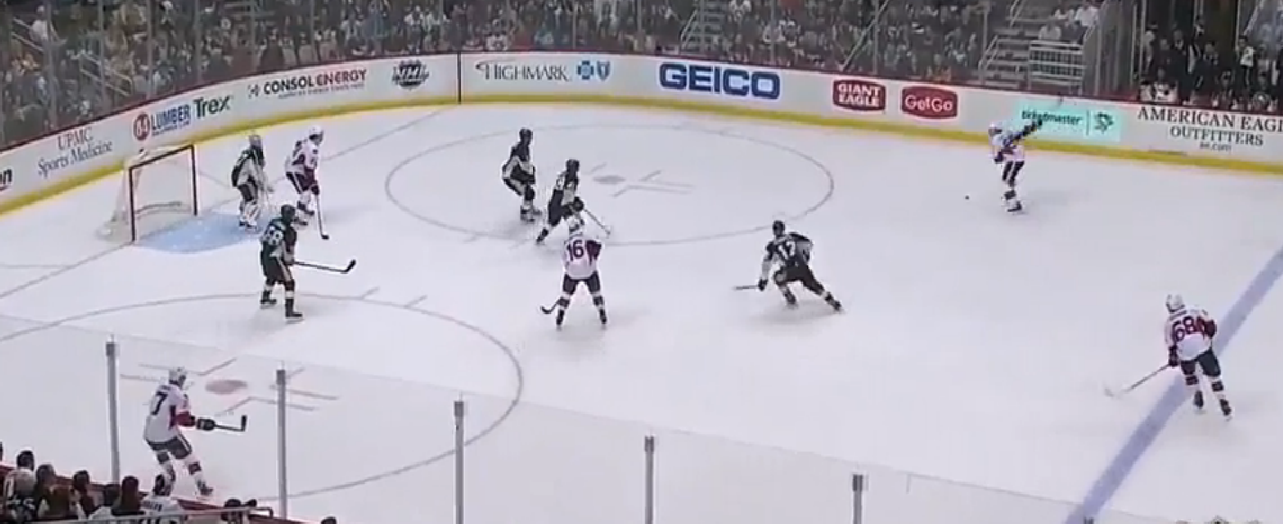
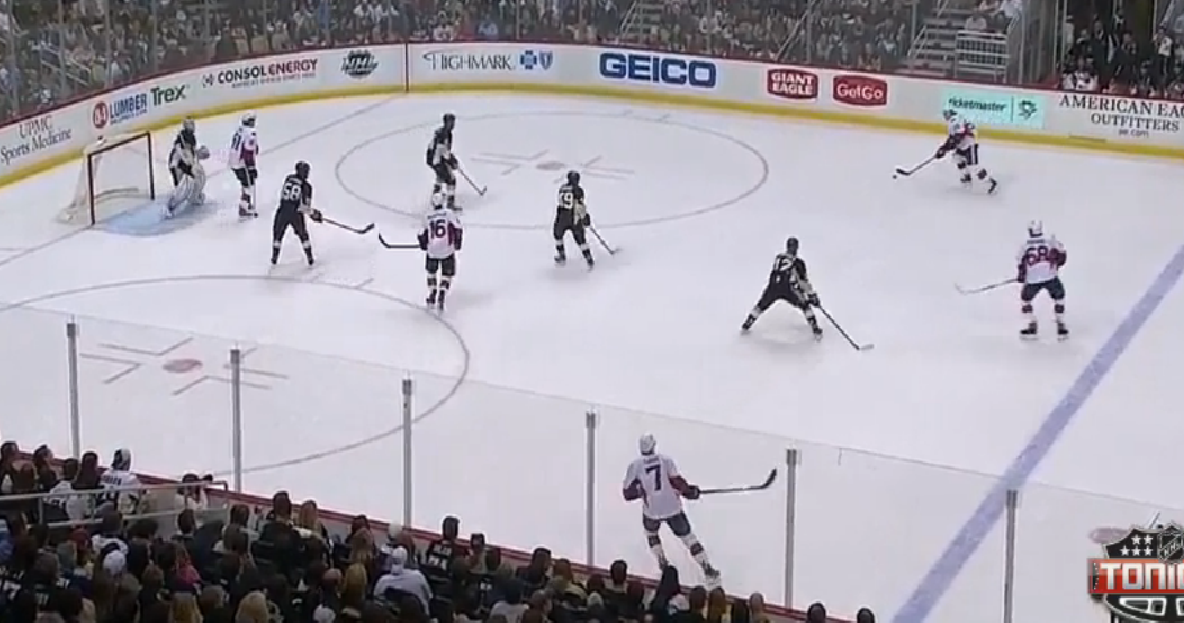
The Senators have four forwards out on this PP, Milan Michalek on right point and Patrick Wiercioch, currently hidden, on left point. Mika Zibanejad, the half boards player, wins his puck battle and pushes it down low to Ales Hemsky.

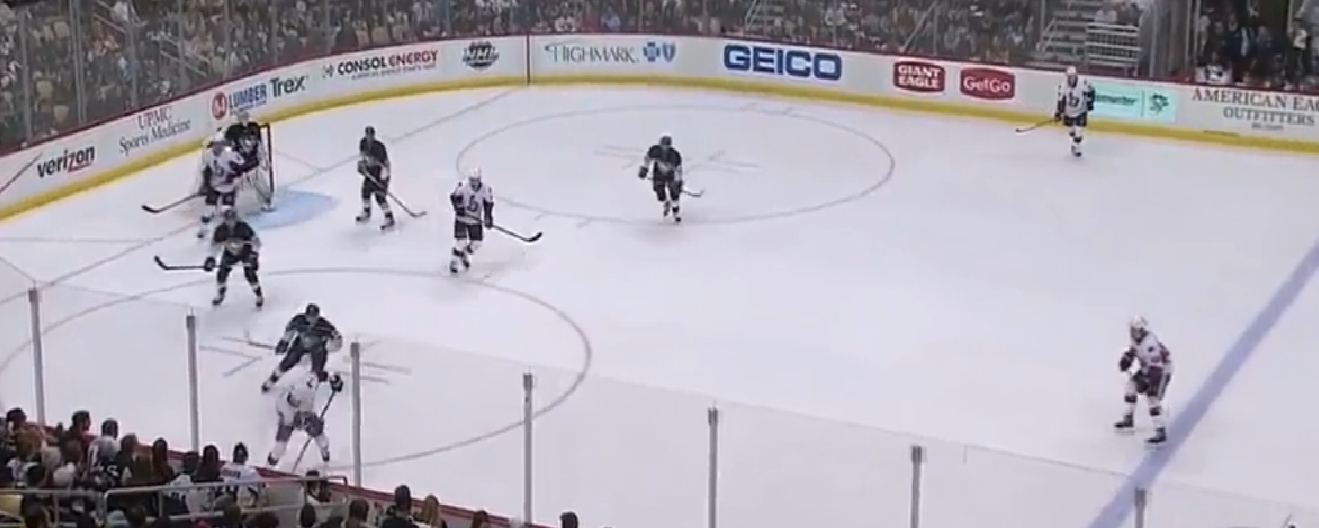
Hemsky gathers the puck down low and is chased by the defender that was previously on Zibanejad, leaving him open. Michalek also sees something brewing and creeps in from the point.

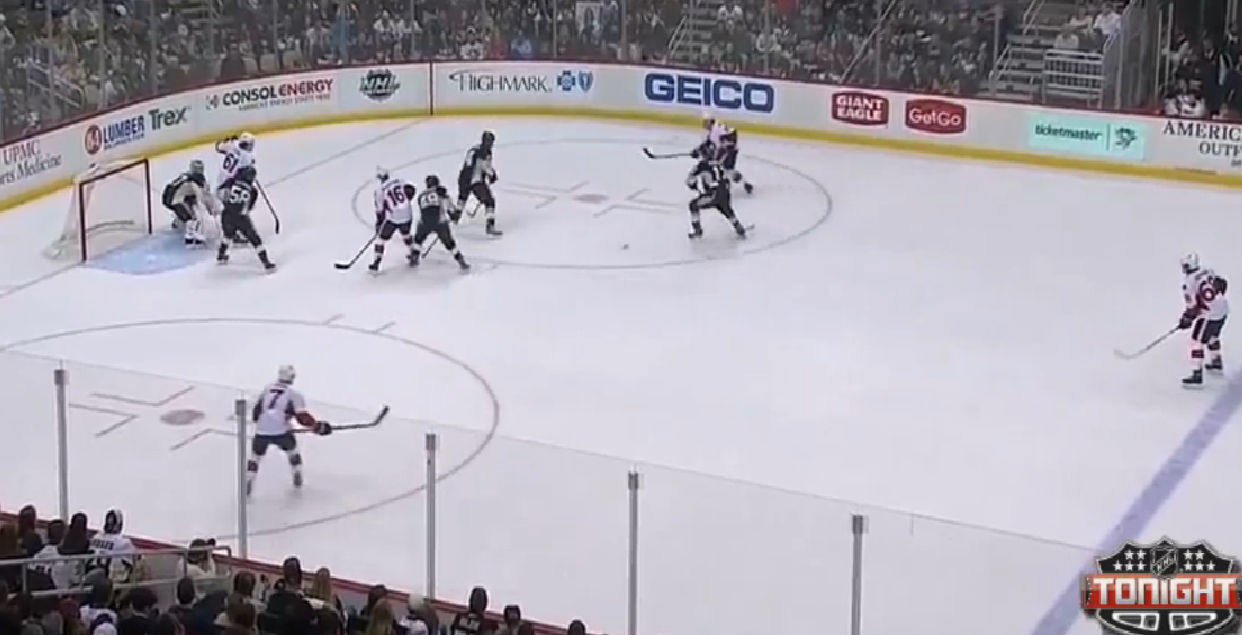
Hemsky gets decked, but reverses the puck up to Zibanejad, who kicks it up to the waiting Wiercioch
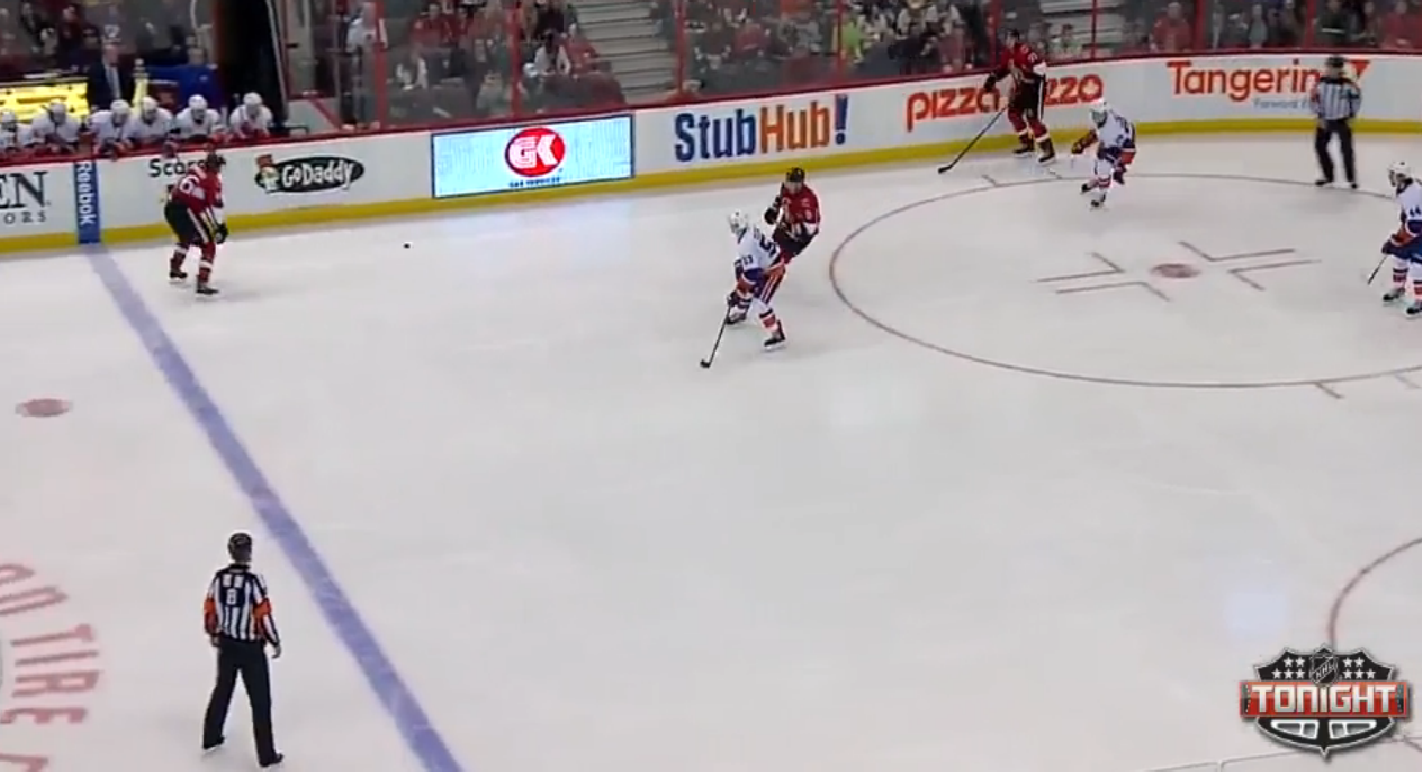
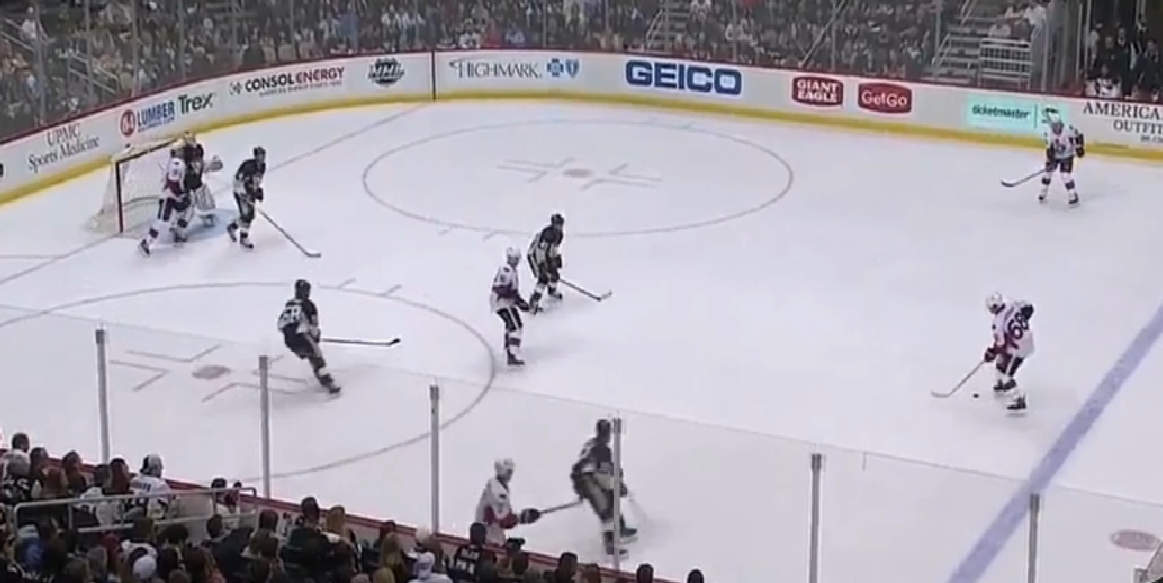
Wiercioch could walk the point, like the diagram states, but he sees a lane open and decides the fire right away. He knows that Chris Neil is in front of the goaltender, providing a screen, and that he has Hemsky if the Sens need to retrieve the puck. Michalek sees Wiercioch is going to shoot, and decides to circle past the Isles defender, who is focused on Wiercioch.

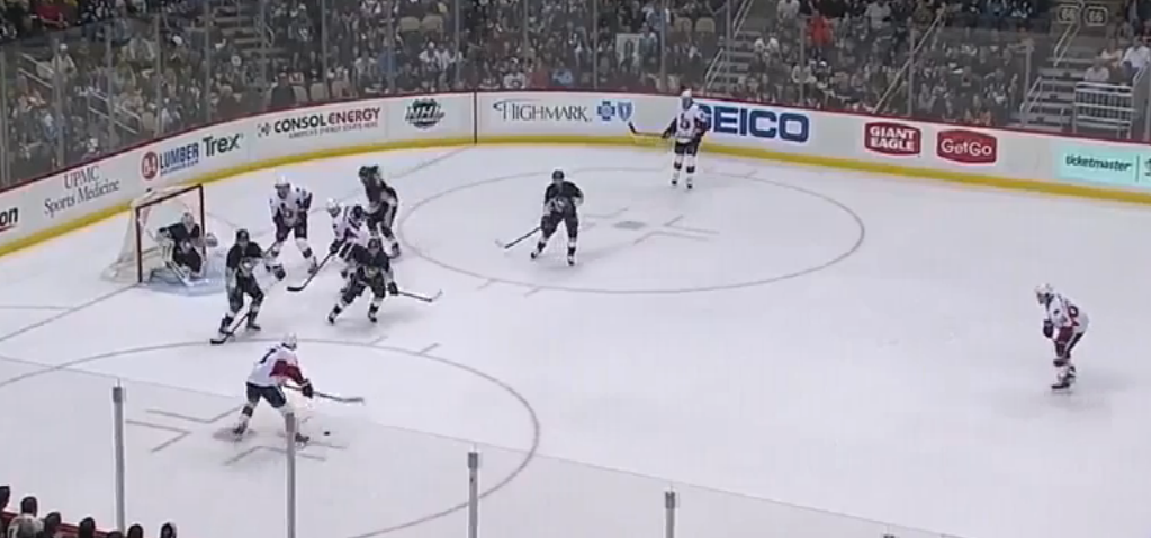
The strong side D, Wiercioch, gets his shot through, and has Neil and Hemsky at the net attacking the puck. It actually squeaks out to Michalek, who comes in from the right point and pots the goal since three Isles defenders are preoccupied with the strong-side forwards Hemsky and Neil.
As you can see, overloading the strong side has its obvious benefits. Once the shot gets through, there are a glut of forwards there for a deflection, rebound, or to retrieve the puck if need be. A limitation of this formation would be that it's relatively easy to clear the puck afterwards for the Isles defenders - shoot the puck to the weak side - or that if Wiercioch misses his shot to the right, it's hard for anyone to get the puck before it exits the zone, costing the PP another 20 seconds to set up.
1-3-1
Looking at games exclusively after the trade deadline, I'd say that the 1-3-1 was the Senators most common PP set up, especially for unit one. In this formation, there are essentially two strong sides, as both half boards become an option for the offense. Due to the frequency of east-west passes in this set up, it's hard for the opposing penalty killers to defend as they have to spread out on both sides. The key to this formation is to have clean, crisp passes and the ability to position yourself well under pressure to either reverse the puck back up to the point, or to go down low if need be.
We'll examine two plays by the Senators offense that lead to goals: one more common, and one a bit more complicated.
Half-Boards Shot/Cross-Ice Pass
This formation requires a lot of passing skill, as F1 and F2 execute a cross-ice pass in order to spread the defenders. What's important here is the diamond set up with F3, F1, D1, and F2, which provide a lot of offensive options. The puck, initially passed between F2 and F1, work their way back up to D1, who can then pass it off to the now open F2 for the one-timer.
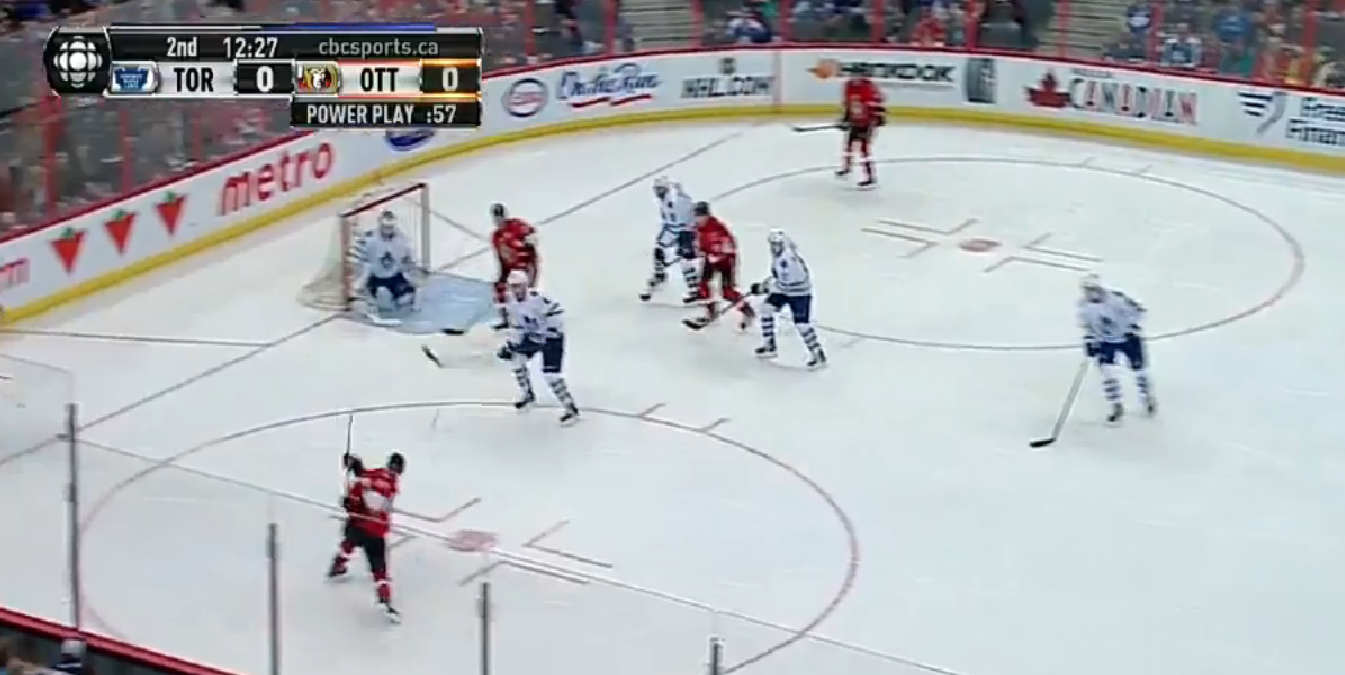
Here's an example of the Senators executing this against Toronto.
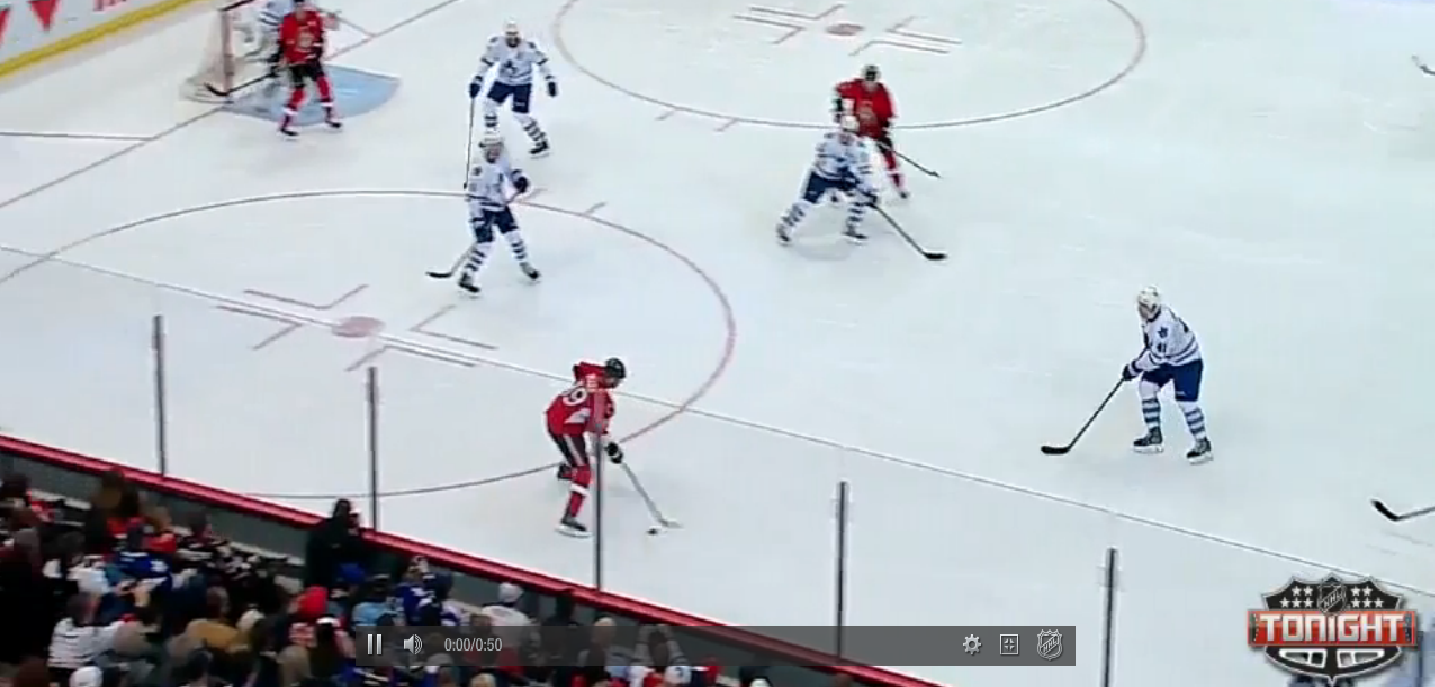
Here we have the point man, Erik Karlsson (stick shown on the left), and the two half board players in Jason Spezza (shown) and Ales Hemsky (top right corner), who's playing a little higher up right now. The presence of Milan Michalek (labelled D2 on our whiteboard picture above) gives Spezza time to wait for a play to develop, as a defender has to stay on him.

A play does open up for Spezza, who after being pressured by Kulemin, unleashes a cross-seam pass to Hemsky, who creeped in from the right side boards. Now, Hemsky could shoot here, but he realises that Reimer is playing deem in his net and will probably get across so...
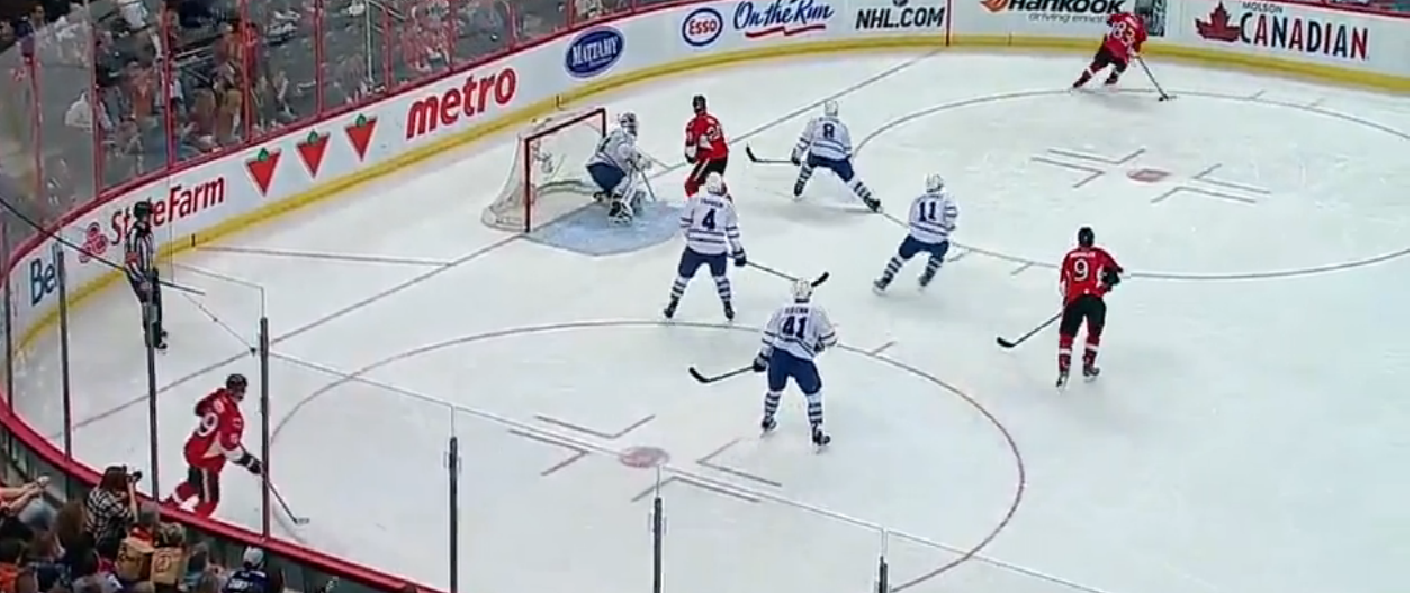
He circles around and takes the defenders with him. There's the benefit of having the skill to pull off a cross-seam pass - as Spezza and Michalek are both relatively open.
Hemsky's a smart player, and buys some more time for Spezza - the eventual finisher on this play - to get open by faking a shot here.
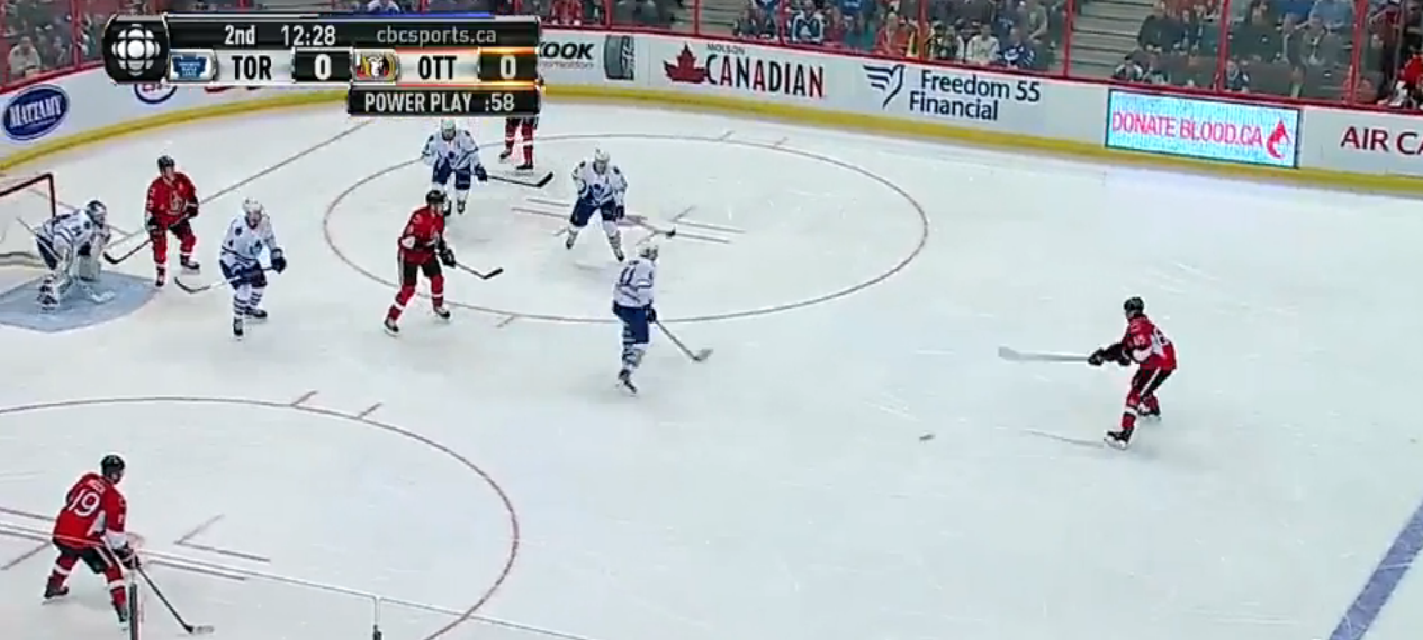
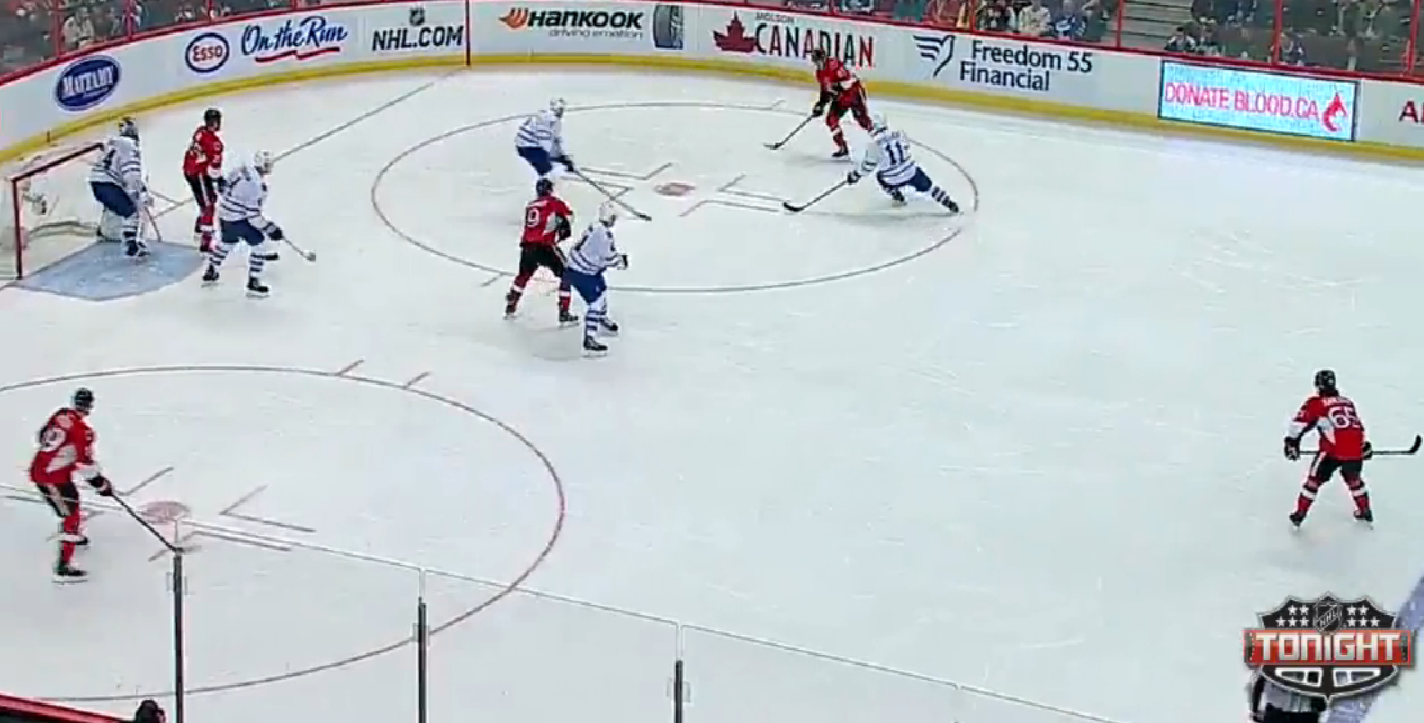
His fake shot turns into a pass back to Erik Karlsson, who has miles of space to shoot if he wanted to. However, he sees Spezza wide open and quickly one-touches the puck off to him. Here's the benefit of the 1-3-1 in action - the space that a premier PPQB in Karlsson has to basically do whatever he wants to generate a scoring chance here due to the defenders so spread out and pre-occupied by the line of three forwards.
Our beloved ex-Captain wastes no time blasting a one-timer by Reimer to give the Sens a 1-0 lead.
Low Release Play
The second, and more complicated play often used by the Senators top PP unit involves a lot of passing skill as well.
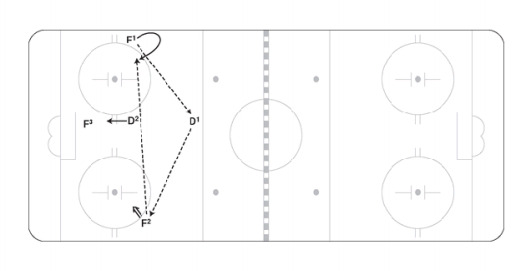
The puck moves its way around our top triangle of D1, F1, F2 until F3, now at the goal line, becomes open. Here, he has a ton of options: he can pass it back to the closer half boards forward, can try and set up the player labeled D2 for a one timer, or can make a difficult goal-line pass to the opposing half boards player (F1).
Time to see which option is selected against the Winnipeg Jets.
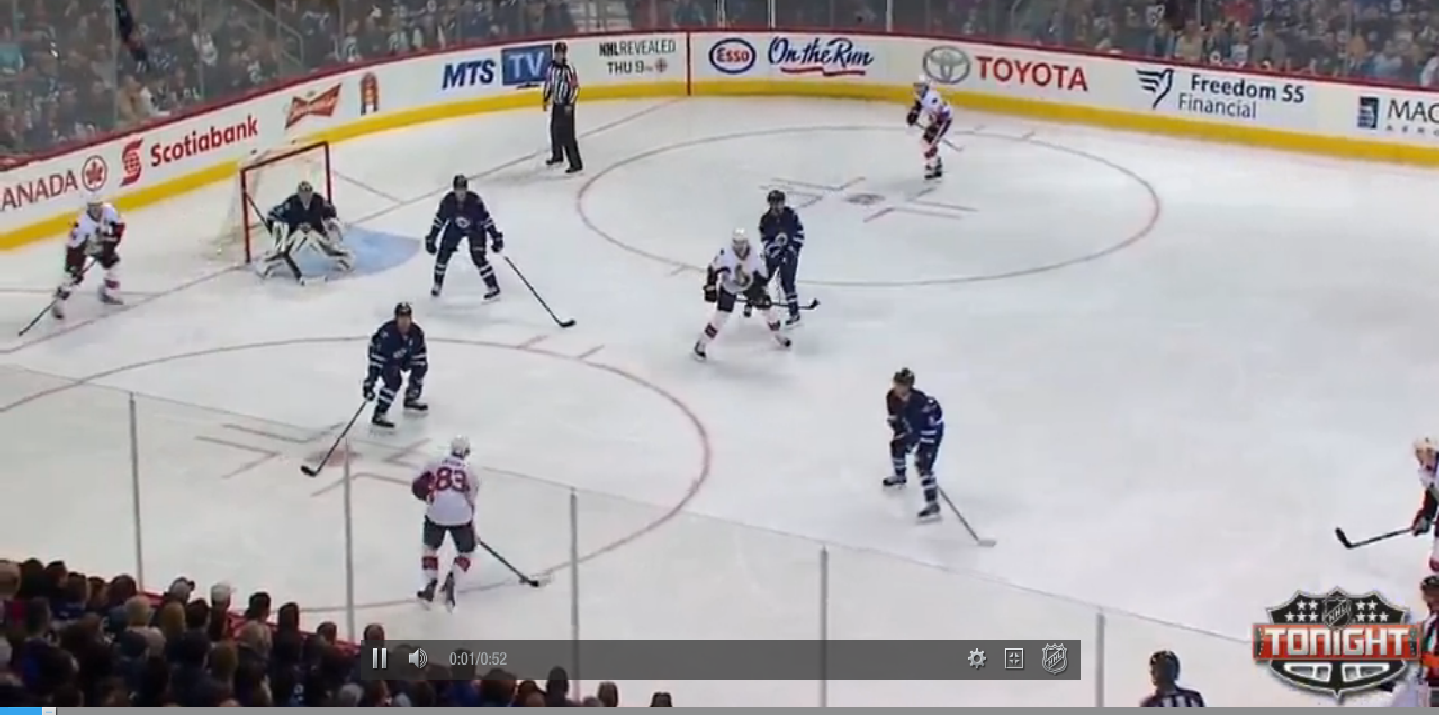
So here's our typical 1-3-1 set up. The puck had already moved it's way around the D1, F1, F2 triangle once before, with D1 handing the puck off to Hemsky on the left half boards.
Hemsky sends the puck down low to Spezza, our waiting F3 that will now have a wealth of options available to him. The Jets PK diamond is very concentrated on the strong side at the moment, but is leaving Spezza, D1, and Hoffman over at the right half boards open in order to defend the middle of the ice and block any cross-ice passes (or so they think).

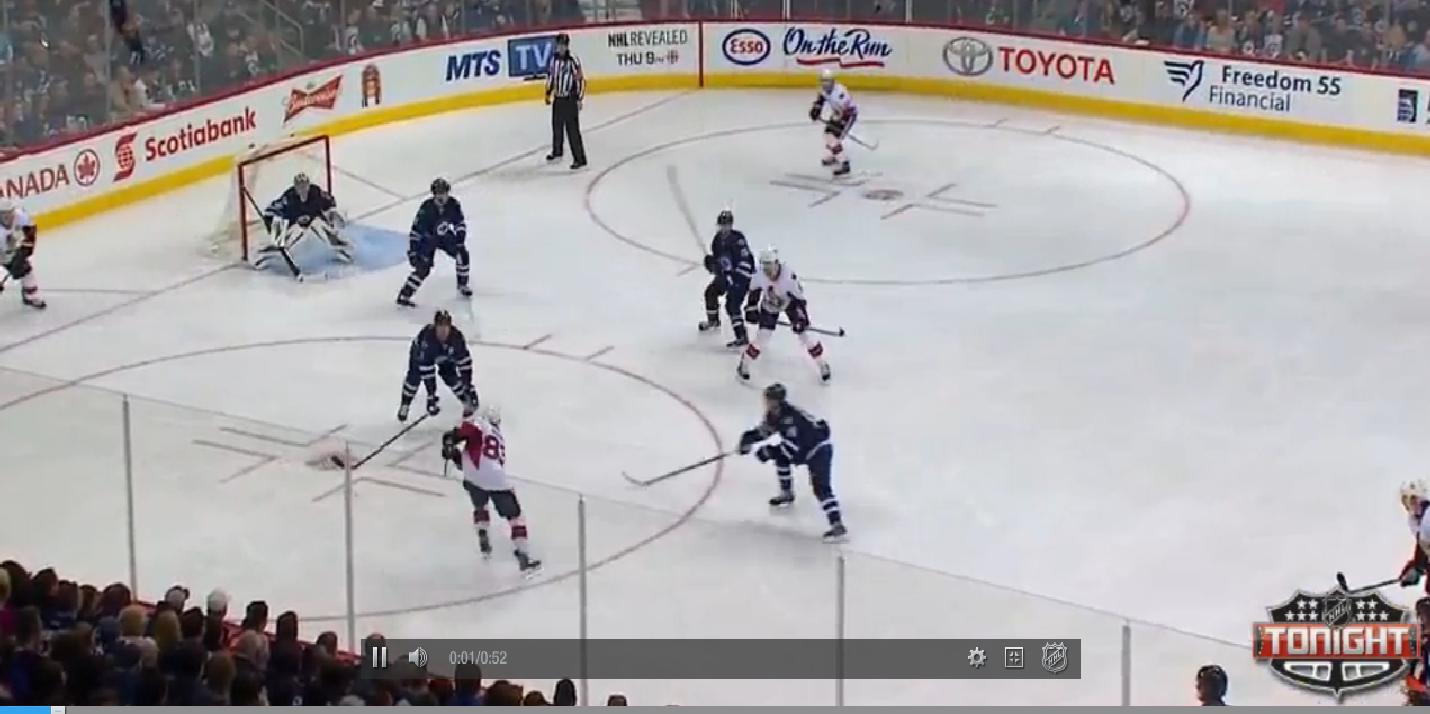
Spezza, F3, immediately knows what play he's going to make, and quickly passes the puck across to Hoffman, our F1 who has creeped in all the way from the top right half boards to position himself at the near edge of the faceoff circle as showcased in our whiteboard diagram above.

The conservative Jets defenders are victimized by Jason Spezza's incredible pass, and Mike Hoffman shows great finish by one-timing it into the net. Not bad for your first NHL goal, eh?
Here we can see the difficulty in executing this type of play, as it required two pretty difficult passes by top-level playmakers in order to get it to work. The 1-3-1 is a "newer" formation and is fantastic if you have the playmaking personnel to pull it off. If it doesn't work? You waste a lot of time with cross-seam passes getting intercepted and cleared down the ice compared to the overload, which is often better for puck retrieval on the strong side. The 1-3-1 is definitely a set up for shooters to show off their one-timers, and is often used by the Capitals or the Lightning to set up Ovechkin or Stamkos respectively.
The Split Powerplay
This formation is kind of like a combination between the overload and the 1-3-1, with the extra point man either a) staying at the point to form an overload setting and isolate the strong side, or b) creeping down the half boards to open up side-to-side options. The key is that extra forward or defender being mobile to throw the defenders off balance by shifting tactics.
As you'll see shortly, this formation works well with Erik Karlsson's mobility when MacLean decides to run a four forward, one defenseman unit. Karlsson, at the point, can open up lanes easily with his lateral movements, as we'll see now.
We can see the "split" set up here really well. The offense is more spread out, like the 1-3-1 formation, but there are two players at the point. Both D, especially D2 in this case, are mobile to keep passing and shooting lanes open. The example I'm going to show has this formation flipped, with Erik Karlsson as the mobile D2, and Kyle Turris as the shooter at F1. The puck will work its way around our F1, D1, D2 perimeter. F2 is providing a puck-retrieval option and F3 is in front of the net for the screen.
So here we have it. F3 is in front of the net and Karlsson has creeped in from is D2 point position to attempt a shot. Forward Mike Hoffman is playing point with Karlsson, and Turris is perched at the left half boards. Although this initially looks like a 1-3-1 with MacArthur in the middle, watch what happens as the play unfolds.
Karlsson's shot is blocked, and ends up at the left half boards with our F1, Kyle Turris. He gathers the puck and works it around to his near-side D in Hoffman.
Here we see the difference between the split PP and the 1-3-1 - Erik Karlsson is not at the half boards, but is instead at the right point. Turris and MacArthur are both pretty high up, and the set-up is very spread out unlike the overload formation we looked at earlier.
Hoffman sends it over to Karlsson (D2), who does the little wiggle motion shown in our whiteboard picture by carrying the puck to the start of the faceoff circle in order to open up Turris, who sees this and starts to creep down.
Notice that in around three seconds, our two defenders at the point set up as switched into a 1-3-1 with Hoffman at the point, a net presence, MacArthur in the middle (currently boxed out), and Karlsson (right half boards) threading a cross-seam pass to Turris (at the left half boards). This switch is the key factor in the split powerplay set up, and is only usable when you at the point mobility that I noted earlier. Erik Karlsson makes this play happen.
Kyle Turris finishes with a beautiful one-timer goal. I also want you to notice that unlike a typical 1-3-1, MacArthur and another Sens forward are BOTH at the net, akin to the overload play I first showed with Neil and Hemsky at the net, ready to gather up any rebound or to tip the Turris shot.
Again, I stress that the split PP is almost like a hybrid between the overload and the 1-3-1, which I hope I showcased here. If you have the mobile D to make this work, it's a very unique set up and requires a lot of practice, but I think could lead to a lot of success.
--
I know this article was pretty long, but I hope that I showcased a variety of powerplay formations and plays. I'm always looking for feedback, so let me know in the comments section! Also, keep an eye out for the final installation in this series, the Dump In, later on.
Thanks for reading.